Showing posts with label DIY. Show all posts

Tuesday, March 1, 2016

*Bliss Balls*

0

I just wanted to let you know that beside being a fashion lover, I'm also a foodie sooooo, this time I have a recipe for you guys!
I love healthy and delicious food, but It's quite hard to get good and natural snacks sometimes...
so I decided to show you guys what I make to avoid eating super processed food and also getting in all the protein and carbs I need!

Here are my *Protein Bliss Balls*


Recipe (makes 18 of this babes):
  • 100grms (1 cup) of prunes (you can use pitted dates too).
  • 120grms (1 cup) almonds.
  • 1 Scoop vanilla protein powder (Optional if you want to give this balls a punch of protein).
  • 1 teaspoon of vanilla extract.
  1. Soak the prunes or dates in warm water for about 5 mins.
  2. Put the prunes or dates in a food processor and add only 2 tablespoons of the water they were soaking in.
  3. Add the rest of the ingredients in the food processor and process until you get a sticky texture.
  4. Make little balls with your hands.
  5. Put them in the freezer for a few hours or leave them overnight.
  6. Enjoy!!!


I swear these are super easy and yummy! Hope you like them and if you try them let me know what you think!

Love Jo xoxx

Sunday, August 31, 2014

90s Famous Chokers + DIY

0

The 90s were a crazy and rad period for fashion.
I remember reading a while ago a post of 'Fashion trends that should never come back' or something like that, and guess what... Tattoo choker were there! But once again guess what... THEY ARE COMING BACK! 


Luckily for me, as I wasn't alive for most of the 90s, I'm really happy they are coming back. IT'S MY CHANCE TO WEAR THOSE MOTHER F**KERS!


Even celebrities like Emma Roberts and Katy Perry are wearing them, so we can say It's official right? 

Now, I'll make a DIY so if you can't find it anywhere near you, at least you can make one!

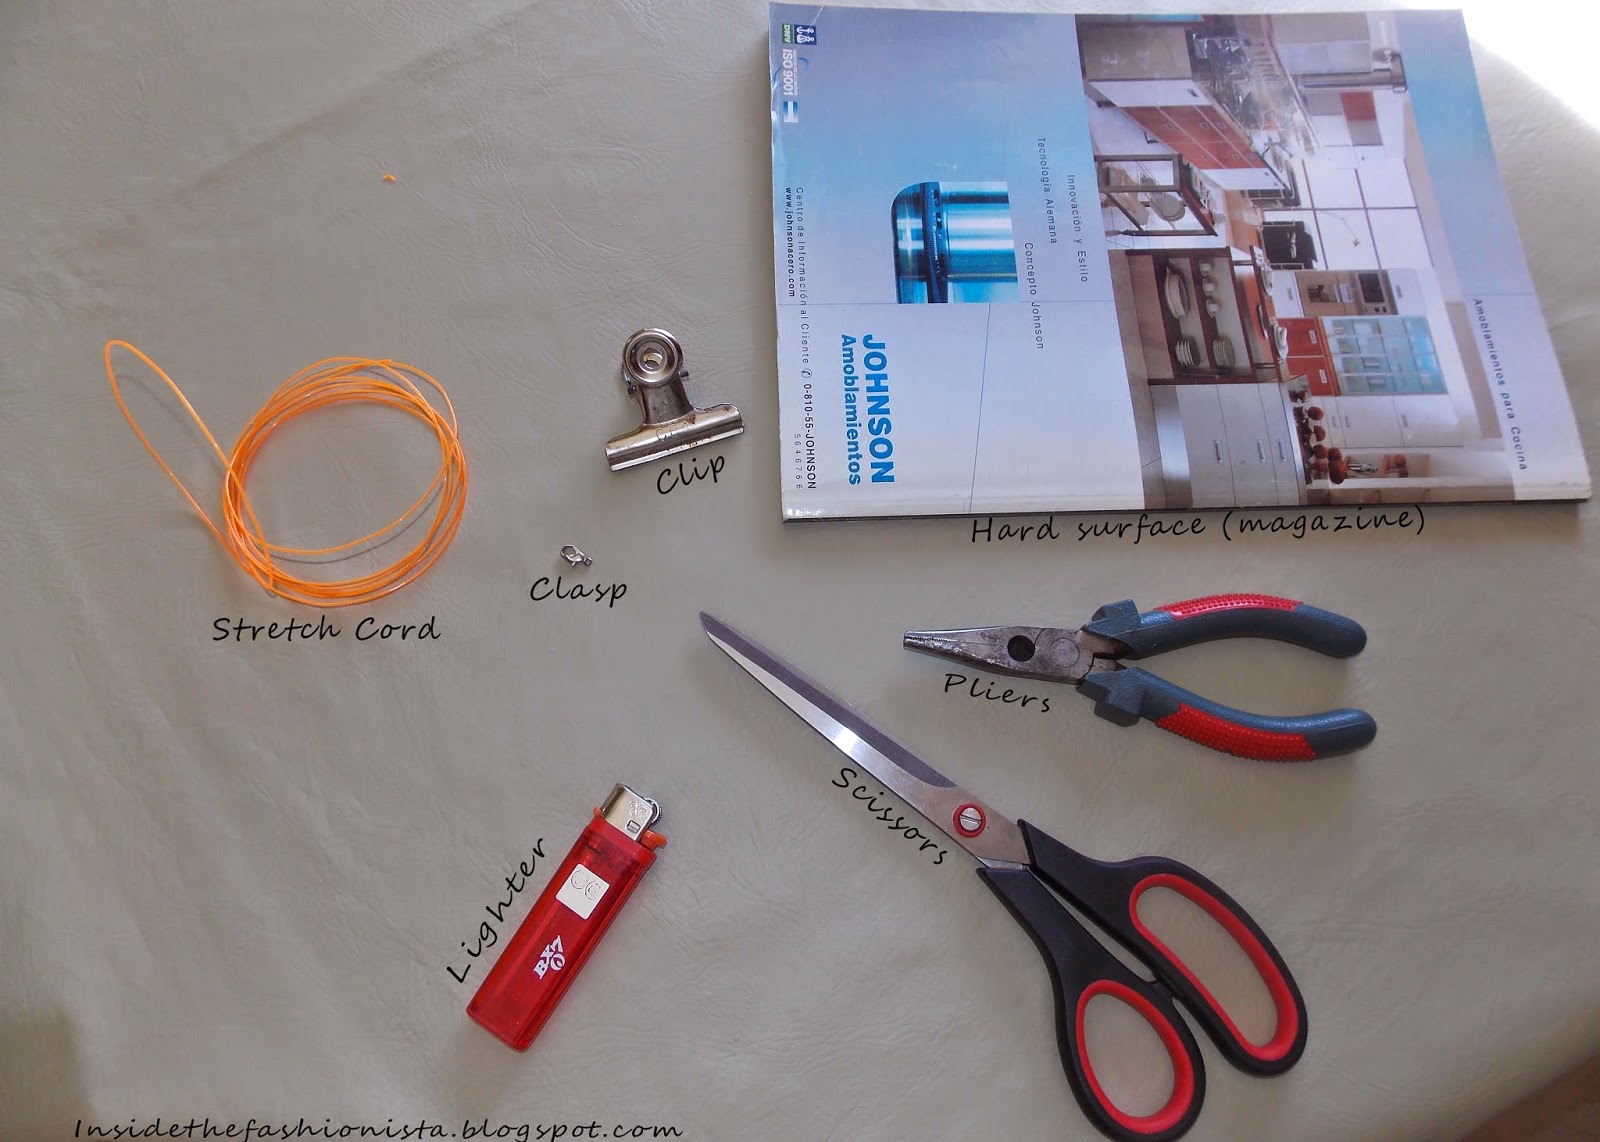
MATERIALS
STEP BY STEP:
1.Fold the stretch cord (I cut it about 2 arms long) and clip it to the hard surface! Like in the picture.
2.Now choose one side and make a curl like this one:
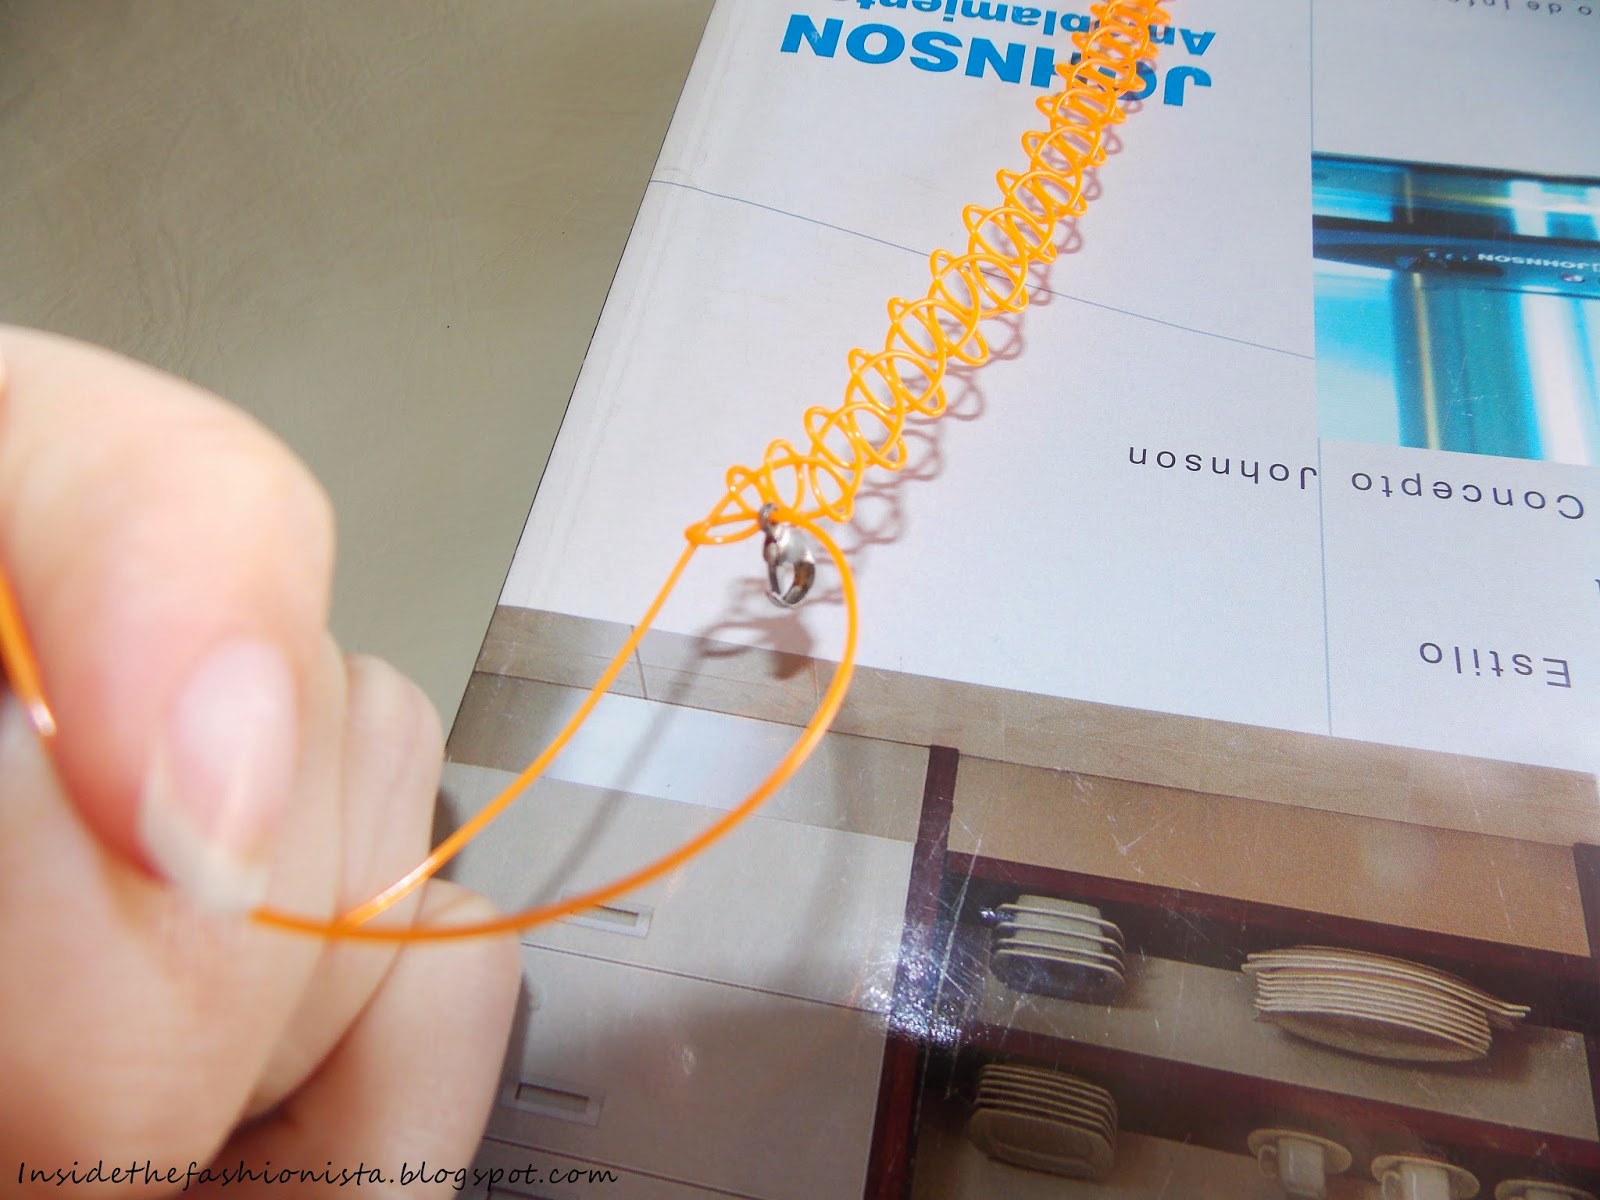
3.Now, take the other side and just put it inside the curl. (I know it's hard to understand) Or just look:


4.Ok, now do the same but with the other side, I mean make a curl and the pass the other side through the curl.

5.Now continue doing the same one time each side until you have the length that you want. (I'm making a bracelet for a choker you will need it to be a bit longer)
6.Once you have your desired length, tie a (or two) knot with the endings

7.Now with put the clasp on one ending and tie another knot to secure it.

8.Cut the remaining chord. (I like using the pliers to hold them)

9.Burn the endings to make sure it won't untie. (I also like holding them with the pliers so I don't burn)

CONGRATULATIONS NOW YOU HAVE YOUR OWN 90'S TATTOO CHOKER OR BRACELET! 

Monday, August 18, 2014

Ripped knees Jeans + DIY

0

Lately I've been seeing this jeans in almost every street style picture.
Ripped jeans have always been an essential in any wardrobe, but this ones are a bit different.


Just a straight cut in the knees.


I was searching, and there are some good ones online, but they are unnecessarily expensive. Instead I brought to you a nice DIY! 

THINGS YOU NEED!

Put your Jeans on!! Ok, now mark with you white eyeliner a line where the middle of your knees are. Like this:
  Take them OFF!! And now cut over the line that you drew!
 Put them on. You now must have something like this.
Take your file and start rubbing those edges until you like it.

WE FINALLY DID IT!


And this is how it looks! If you want a bigger hole, you just cut a bigger hole in your pant and rub the file over it. I just wanted something a bit more discrete. 


Thank you for reading! 
Love you :)